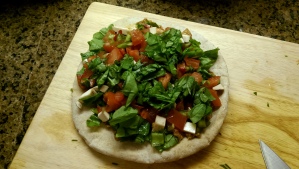
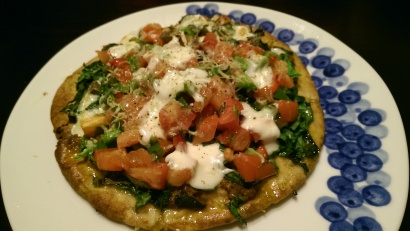
Spinach-Tomato-Pesto Pita

This recipe is my default recipe for using up those last odds-and-ends vegetables in my fridge. When I’ve got an extra tomato, half an onion… I turn to this. It’s also a great Sunday night recipe to make for lunch the next week.

It’s healthy, flexible, and tasty – what’s not to love?

IMAG0012

Take the base recipe (originally from AllRecipes) & make it your own: use the leftovers in the fridge, your favorite veggies, or whatever your dinner-partner will tolerate.

4 whole wheat pitas
1 tub of sundried tomato pesto
1 bunch of spinach, rinsed well & dried
2 tomatoes
2 mushrooms
2 bell peppers
handful of basil leaves, rinsed & de-stemmed (parsley & oregano go well too, if you have those on hand)
olive oil
Parmesan cheese
feta or mozzarella cheese
salt & pepper

pre-cook

1. Preheat oven to 425 degrees. Toast pita for 5 minutes or until beginning to brown. (If you skip this step, the middle will be soggy from the pesto & olive oil at the end.)

2. While the pita is toasting, deseed and chop tomatos, mushrooms, and bell peppers. Toss together with olive oil. Coarsely chop spinach but keep separate.

3. Remove pita and spread with pesto. Top with a layer of spinach, then spoon out vegetable mixture. Tear basil leaves and sprinkle on top. Salt & pepper to taste. Grate Parmesan cheese and add mozzarella/feta.

4. Return pita bread to oven and bake for 10-15 minutes, until the edges are crispy.

Serve hot!
Quick & Dirty: Black Bean Tacos with Avocado-Cilantro Sauce

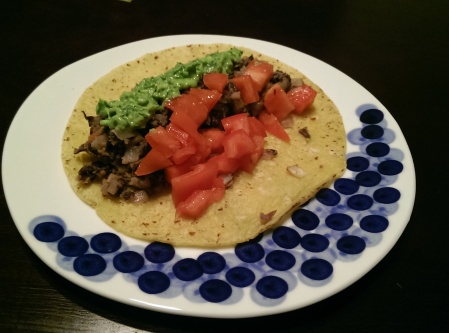
I had intended to have leftovers for dinner, when I found myself paging through some truly delicious-looking Pinterest recipes. I was looking for something else, I promise! I just…got distracted by the recipes. As usual. It turned out to be a gain, though, because 20 minutes after I found this recipe online, it was sitting in front of me, ready to be eaten.

IMAG0121

As written, the recipe was a bit bland, but the addition of chili powder, oregano, and paprika made it easy to amp up the flavor.

Filling:
Olive oil
1/2 medium onion, diced
2 cans black beans, well rinsed
1 tsp cumin
1/2 tbsp chili powder
1/4 tsp dried oregano, paprika, & garlic powder
1 cup salsa

Sauce:
1/2 avocado
3/4 cup cilantro (destemmed)
1 lime juice
1 clove garlic, minced
1 tbsp olive oil
1/2 tsp honey (the original recipe calls for a whole teaspoon, but I found that too sweet)
pinch of salt, to taste

Toppings (diced tomato, more salsa, shredded lettuce, jalapenos, etc)
Corn tortillas

1. Saute onions in medium skillet until transparent (5 minutes), add spices. Add drained baked beans and mash with fork to desired consistency. Pour in salsa and heat through (another 5 minutes).

2. Warm tortillas for 5 minutes in a oven preheated to 300 degrees.

3. In a food processor, combine sauce ingredients & blend until smooth. Add a little water to thin, if desired. If you don’t have a food processor (or if all you have is an awful blender, like me), it’s still possible to make: chop the cilantro, mash the avocado, and mix everything together well.

4. And that’s it! Spoon filing into the tortilla, add toppings as desired, and generously pour on the sauce!

Original recipe, and some gorgeous pictures, here.

Weekend Breakfasts: Whole Wheat Apple Cinnamon Pancakes

I adore weekend mornings. Waking up lazily, no alarm, a leisurely cup of coffee – what could make it better?

Breakfast, obviously.

I LOVE breakfast. Breakfast-for-dinner is always a great option, but breakfast for breakfast…well now, the options are nearly endless.

I went a bit overboard buying apples last week (remember – it’s fall, guys?!), which gave me the perfect excuse to try this recipe.

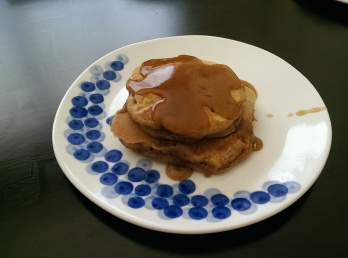
Whole wheat apple pancakes with cinnamon syrup.

It’s a deliciously autumn recipe.

And the cinnamon syrup…I could have eaten that with a spoon.

(Alright, I may have. Just a little.)

IMAG0085

Originally recipe from Two Peas and Their Pod:

Pancakes:
1 cup whole wheat flour
2 tbsp brown sugar
1 tsp baking bowder
¼ tsp baking soda
½ tsp salt
1 tsp cinnamon
¼ tsp allspice

1 cup + 2 tbsp buttermilk
1 tbsp canola oil
1 egg
1 tsp vanilla extract
1 cup diced apple (peeled)

Syrup:
¼ cup white sugar
¼ cup brown sugar
1 tbsp all-purpose flour
½ tsp cinnamon
½ tsp vanilla extract
½ cup water

  1. Mix together dry ingredients in medium bowl. If you prefer thicker pancakes (for me – the thicker & fluffier, the better), add an additional ¼ cup of flour.
  2. Combine wet ingredients, fold into dry ingredients & whisk, adding diced apples. Don’t overmix.
  3. Spray griddle or flat pan with nonstick cooking spray and heat to medium. Pour ¼ cup of mix onto heated surface and flip when the edges start browning.
  4. As you’re making the pancakes (each one will take 5 or so minutes per side), stir together dry ingredients in a small saucepan. Add vanilla & water, then bring to a boil. Stir often and keep on heat until it thickens – about 7 minutes.
  5. Let syrup cool slightly, and serve pancakes while hot!

Falling Even Further into Fall: Sweet Potato Pie

I may have gone a little overboard at the farmer’s market last weekend. I came home with a large bag of apples, eggplant, squash, and several pounds sweet potatoes.

In my defense, though, it’s the first appearance of fall foods! Maybe not THE most wonderful time of the year, but certainly up there.

With all this food, I needed some good fall recipes. I found them in spades (thank you, allrecipes & pinterest!).

I decided to go for the sweet potatoes first: and I settled upon sweet potato pie.

IMAG0057

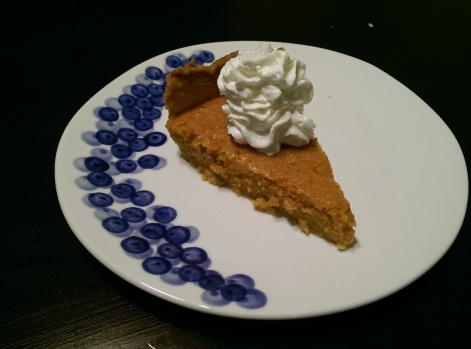
Healthy (…kind of), delicious, and oh-so-fall. It has a similar texture to pumpkin pie, but with that great sweet potato flavor. I cheated and used store bought piecrust, which made the recipe incredibly easy to make – the hardest part was cooking the sweet potatoes.

2 medium sweet potatoes
1/2 cup melted butter
1/2 cup each brown sugar, white sugar
1/2 cup evaporated milk
2 eggs
1/2 tsp each ground nutmeg, cinnamon
1/4 tsp ginger
1 tbsp flour
1 tsp vanilla

1. Preheat oven to 400 degrees. Prick sweet potatoes & bake for 45-50 minutes, or until tender (alternatively, you can boil them for 45 minutes, but I think baking them preserves the taste better. Remove from oven and rinse with cold water to remove skin. Mash in large bowl. Lower oven temperature to 350 degrees.

2. Beat butter into mashed sweet potatoes (I used a hand mixer, which helped considerably). Mix in sugar, evaporated milk, eggs, spices, and vanilla. Beat until creamy. Stir in flour to thicken. Pour filling into pie crust.

3. Bake for 55-60 minutes (don’t forget to lower it to 350 degrees), until knife inserted comes out cleanly. Cool on counter for half hour, then in fridge for 3 hours.

Don’t neglect that last step – I cooled it for a half hour and cheated, and I was disappointed until I had a piece later (…for breakfast. It was a perfect breakfast). The flavor & texture improves a ton once it’s chilled completely.

Once you’ve restrained yourself until it cooled all the way…add some whipped cream on top and dig in!

Recipe adapted from Divas Can Cook and AllRecipes.

Tex-Mex: Now in Your Kitchen! (Chicken Enchiladas)

I make no secret about one of my favorite things about Houston: the delicious, incredible Tex-Mex. What’s not to love about it? Wonderful flavors, edges of heat and spiciness, a nearly endless variety of food, refreshing margaritas… It’s almost impossible to go wrong.

Until I try to make it myself. I can make a mean taco, but I’ve never had much success with much else. My food is never as flavorful; the meat never as moist.

Until now.

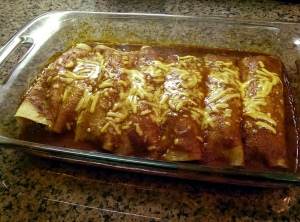
in pan

Red-chili-sauce-chicken enchiladas. They are, in a word, amazing.

Fair warning: my kitchen was a mess after this. It took about an hour & a half from first chop to taking out of the oven, so it’s not a quick & easy recipe.

But oh my. So worth it.

The original recipe is from Cook’s Illustrated All-Time Best Recipes book, with only slight modifications. I highly recommend the book. It’s easy to following, has interesting stories, and so far, delicious food.

enchilada

Sauce:
olive oil
1 small onion (or 1/2 medium)
2 cloves garlic
2 chopped jalapenos
3 tbsp chili powder
2 tsp each ground coriander, ground cumin, oregano, sugar
1/2 tsp salt
4 boneless, skinless chicken thighs in 1/4″ strips
1 16-oz can of tomato sauce
3/4 cup water

Filling:
1 lime
1/2cup chopped fresh cilantro
2 cups cheddar or Monterey Jack cheese
8 small corn tortillas

Toppings:
1 cup cheddar cheese
sour cream, avocado, lettuce, tomatoes, limes

1. Make the sauce: Finely chop onion & garlic, saute in a meduim/large skillet in olive oil over medium heat for 5 minutes. Add chopped jalapenos & stir for several more minutes; then add spices, sugar, and salt. Stir constantly for 30 seconds.

2. Add chicken and stir until coated (about a minute). Add can of tomato sauce & water, bring to a low boil. Reduce heat and simmer uncovered for 10 minutes, stirring occasionally.

3. Remove from heat, and strain chicken-sauce mixture, collecting the smooth sauce in a bowl. Strain as thoroughly as possible. Mix chicken/jalapeno/onion remainder with cilantro, cheese, and squeezed lime. Transfer chicken to freezer to cool until filling.

4. Prepare tortillas: Spray both sides of tortillas with cooking spray & lay on baking sheets. Warm in 300 degree pre-heated oven for 5 minutes  (don’t skip this! This will keep the tortillas from getting soggy & make it MUCH easier to fill), then remove & set out on countertop. Pre-heat oven to 400 degrees.

5. Roll enchiladas: Cover bottom of 9×13 casserole dish with sauce. Place 1/2 cup filling in the center of each tortilla, roll tightly, and place (seam down) in the baking dish. Pour remaining sauce over the enchiladas, and top with cheese. Cover with foil and bake for 25 minutes, until heated thoroughly.

Remove, garnish with lime & other toppings, and serve immediately!

Spiced Apple Mug Cake

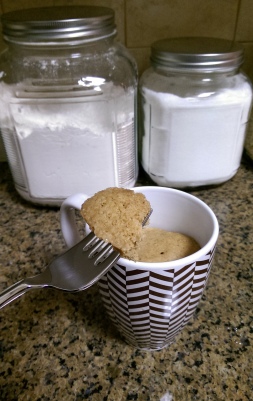
mug cake

I was sitting around one night after dinner, not particularly hungry but desperately craving something sweet. I took to Pinterest to distract myself and found this little gem: spiced apple mug cake. Apples, cake, near instant gratification… what more could I want? Since it’s a microwave mug cake, there aren’t actual apples in, but the spices mean one important thing:

It’s officially fall, y’all.

mug with yogurt

I made some modifications to make it healthier, and it ended up more of an apple bread rather than cake. No less delicious, though. And since any apple dessert calls for vanilla ice cream, I substituted what I had on hand: plain greek yogurt and honey. It ended up being healthy, delicious, quick dessert. Exactly what I wanted!

1/4c whole wheat flour
1/2tsp apple pie spice – the original author has a great mix, but a store premix works too
1/2tsp baking powder
1 1/2tbsp brown sugar
1 generous tbsp white sugar
pinch salt

1 1/2 tbsp plain applesauce
2tbsp + 1tsp skim milk
1tsp vegetable oil

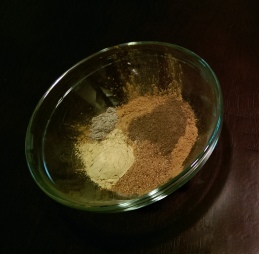
apple spice

Just look at those gorgeous spices

1. Whisk dry ingredients together in a small bowl.

2. Add wet ingredients and mix until smooth.

3. Pour into a mug, stick in the microwave, and zap for 1:50.

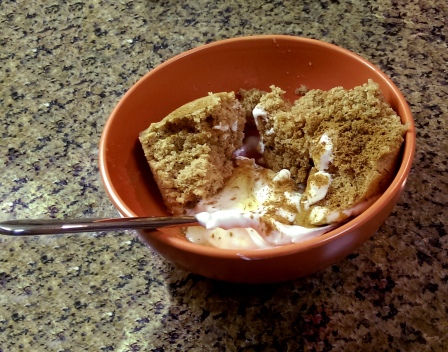
And that’s it! You’ve got apple spice mug cake. That easy. I dug the cake out of the mug, plopped some of my greek yogurt on it, and drizzled honey on it. The original recipe calls for salted caramel sauce, but I all I had was the honey. To me, the honey added just the right note of sweetness. To keep the apple pie taste, I sprinkled (poured) more cinnamon over top.

Delicious.

cinnamon yogurt cake

Original recipe here.

Fresh, Tasty, and Easy: Twice Tomato Bruschetta

I had some leftover tomatoes & extra basil to use up, so I decided to try the bruschetta recipe I had stumbled upon earlier this week. I stopped by the store on the way home from work to pick up a baguette, and that was honestly the hardest part making this.

eating

Perfect for a bite-sized dinner side or appetizer!

Doesn’t that look delicious? It’s healthy (bonus if you’re using whole grain bread!) and tastes amazing, especially if you’re using fresh herbs.

3 roma tomatoes
2 tbsp olive oil
1/3 c sun-dried tomatoes (in oil)
1 clove minced garlic
2 tbsp olive oil
2 tbsp balsamic vinegar
1/4cup fresh basil
salt & pepper to taste
French baguette
6-7 basil leaves, de-stemmed
mozzarella cheese

1. Cut the baguette into thin slices, brush with olive oil, and toast for 3-4 minutes until browned. (Important! If they’re not browned now, they’ll be soggy at the end)

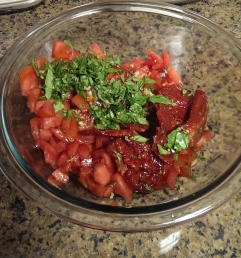
2. De-seed and chop tomatoes, garlic, and basil; mix together in large bowl. Roughly chop sun-dried tomatoes (a messy step since they’re in oil, but I know I have trouble eating the whole ones without making a mess!) and add to the mix.

ingredients

Look at those bright ingredients. Just like Christmas!

3. Add splash of olive oil, vinegar, salt & pepper, mix well. Heap mixture onto toasted baguette slices, add whole basil leaves, and top with chunks of mozzarella cheese.

4. Broil for 6-7 minutes, until the cheese is melted. Serve immediately, while hot!

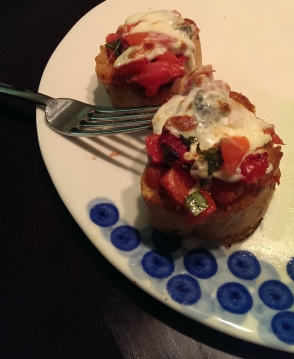
IMAG2845

IMAG2848

I made mine in a toaster oven, which worked wonderful. They toasted quickly and kept my kitchen from overheating (bonus in the Houston weather! Which is still hot).

Original recipe here.

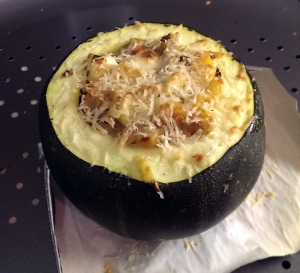
Growing Season (Stuffed Zucchini Balls)

One of the big advantages to the hot, humid, & sweaty Houston summer is the growing season that comes with it. When I came down here (in late August), I was astonished to see tomato plants & herbs still being sold. Combine that with the farmer’s market within walking distance of my apartment, and I’m in fresh fruit & vegetable heaven.

Going to the farmers market has been a learning experience in itself. I’ve always been a suburbanite, going to the grocery store and getting used to uniform size & colored produce all year long. The farmers market, though… all shapes & colors of peppers, differently colored tomatoes & eggplants, and, I discovered, zucchini balls. I had never never seen a zucchini ball before. Upon seeing my first, I thought, wow. Think of all the OTHER vegetables you could stuff inside!

That led to stuffed zucchini balls.

zucchini 2

They were easy and delicious. I altered several recipes to come up with this one, and it’s flexible – use what you have on hand! I made mine vegetarian, but it wouldn’t be hard to add ground turkey or beef – saute it with the onions at the beginning, making sure to cook thoroughly.

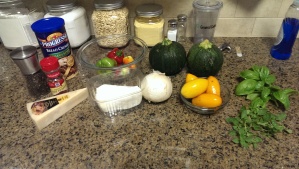
2 zucchini balls
1 tbsp of olive oil
1 med onion, diced
1 garlic clove, minced
handful of fresh basil & oregano
3 tomatoes, chopped & drained
roasted red pepper
1cup bread crumbs
pinch of crushed red pepper
salt & pepper to taste
3-4 fresh basil leaves, chopped
mozzarella cheese
Parmesan cheese

IMAG2814

1. Cut off the tops of the zucchini balls & scrape out the insides. Set aside the meaty part of the inside, toss the seeds. Make sure to drain it well, otherwise it’ll end up watery (same goes for tomatoes below) Cook in a 350 degree pre-heated oven for around 30-40 minutes, until tender.

2. Saute the onion & garlic in olive oil for 3-4 minutes on medium heat, then add chopped basil & oregano. Let cook for 2 more minutes, or until onion is transparent.

3. Combine chopped (drained!) tomatoes, roasted peppers, 1 c breadcrumbs, crushed red pepper, salt & pepper. Mix well, then add to onion mixture. Allow to simmer for 10 minutes, then take off heat & transfer to a medium mixing bowl.

4. Chop mozzarella cheese & remaining basil, add to stuffing mixture, and mix well.

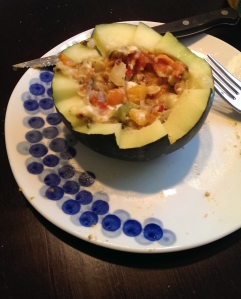
5. If you’re serving it later or planning on leftovers (and they keep well), save this step until you plan on serving it. Remove the zucchini balls from the oven and add stuffing. Make sure to fill it to the top – you want as much of the yummy insides as possible! Top with Parmesan cheese and return to the oven for 10 minutes, or until the cheese is melted & insides warm through.

zucchini 1

Enjoy!

Starting Out Hot

Graduating college, moving to Houston, beginning a new job…and starting a blog! Seems like a logical progression of things.

I’m starting out this blog to keep myself accountable (and to intersperse some words into my days filled with Excel & numbers). I have grand plans (in cooking, as in life), and I always do better if I’m keeping track of myself. Otherwise, before I know it, my grand plan has fallen by the wayside, I’m living off cereal & raw carrots (not that there’s anything wrong with either of those). I love cooking, almost as much as I love eating, and I want to make sure I remember that. Because cereal can be awfully convincing in its call after long days.

This blog will follow my grand plan of cooking adventures. I’ve used so many blogs & recipes from the internet, it only seems fair to give back with what I’ve done!

With that, the first adventure: raspberry scones.

IMAG2776

They were delicious. Fresh out of the oven, still warm, buttery, and not at all like the slightly hard, dry pastries I’ve eaten in coffeeshops. Adapted from an Allrecipes site:

2c light flour (White Lily or similar cake flour)
1/3c sugar
1tsp baking powder
1/4tsp baking soda
1/2 tsp salt
8 tbsp butter (unsalted & frozen)
1/2c sour cream
1 egg
raspberries (or cranberries, raisins, chocolate chips, blueberries…)

Combine dry ingredients in a large bowl. Chop frozen butter into chunks, then cut into flour mixture.

Whisk egg & sour cream until smooth, then add to flour mixture. It’ll be dry & take a while to mix in, but it’ll end up together.

Form dough into circle around 1″ thick, and add raspberries. I did the technical method known as “shoving them in the dough.” Sprinkle with sugar and cut into triangles. Place onto cookie sheet & bake 15min @ 400 degrees. Cool for 5 minutes, or as long as you can wait, and enjoy!